
This FAQ was submitted by Jeff Green
How-To: Installation of new for 2006 Intake for the 4 Cylinder Saab 9-5: PowerPoint Presentation (Click Download Link Below):
This is a How-To on the installation of the new-for-2006 intake for the 4 cylinder Saab 9-5. The new intake was installed on a 2003 9-5 Aero. Saab's new air filter was also installed.
This is a pretty straightforward job that requires minimal mechanical know-how. You'll want a set of ramps, some screwdrivers, and some Torx drivers (the star shaped ones) for your socket wrench.
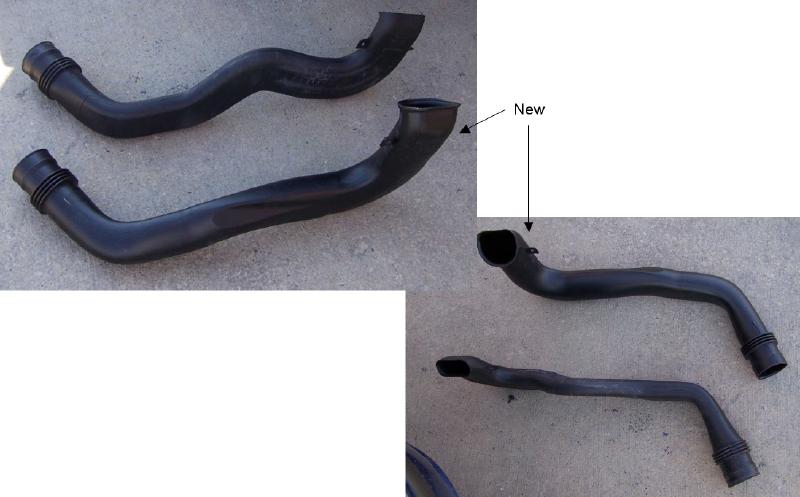
Here's the old and new intakes side by side. Note the new intake has a larger cross section and does not have the elbow in the middle.
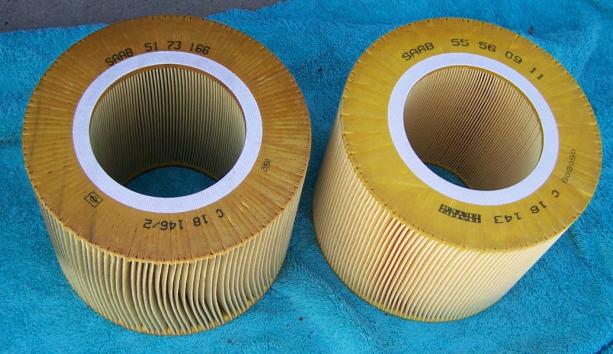
Here's the old air filter and the new one side by side. Note the newer one has more pleats. It's made by Mann for GM and should be available at any Saab dealership for ~$20. No need to search the aftermarket when a high quality OEM product like this is available for a reasonable price!


First you need to remove the grille. On my car, you only need to pull the center portion. I believe earlier models, with the big single piece chrome grill, will require removal of the entire assembly.
On my 2003, removing the grille is simple. Grab the center of the grille and pull upwards. This will disconnect the bottom part of the grille. Then, pull the grille down and forward, which will release the clips at the top. This can be scary as it may seem that you're going to break something. You'll need to pull firmly, give it some wiggles, and it'll come loose.
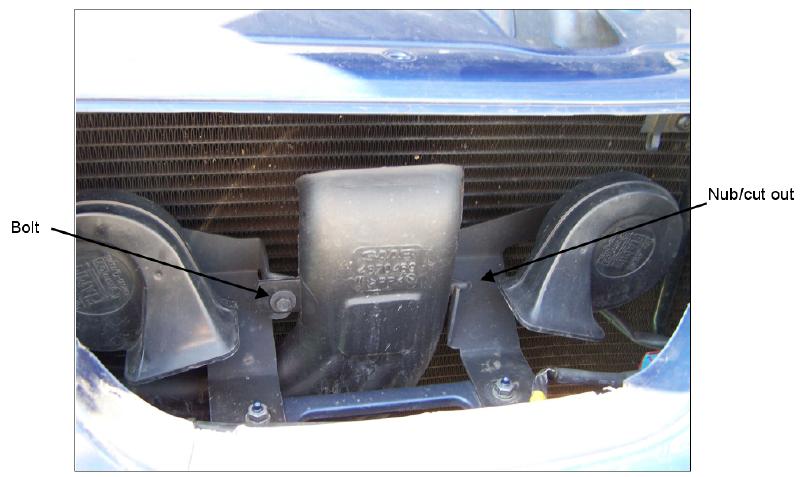
This is what you'll see behind the grille. This is the end of the intake you'll be replacing. It is secured on the left side by a bolt. On the right side, there is a little nub that rests in a cutout on the bracket. Remove the bolt, and pull the little nub up and out of the cutout.
The next step is to raise the front end of the car. Ramps (Rhino Ramps are my personal favorite) or a jack and jack stands will work. Never work under a car that's only supported by a jack!
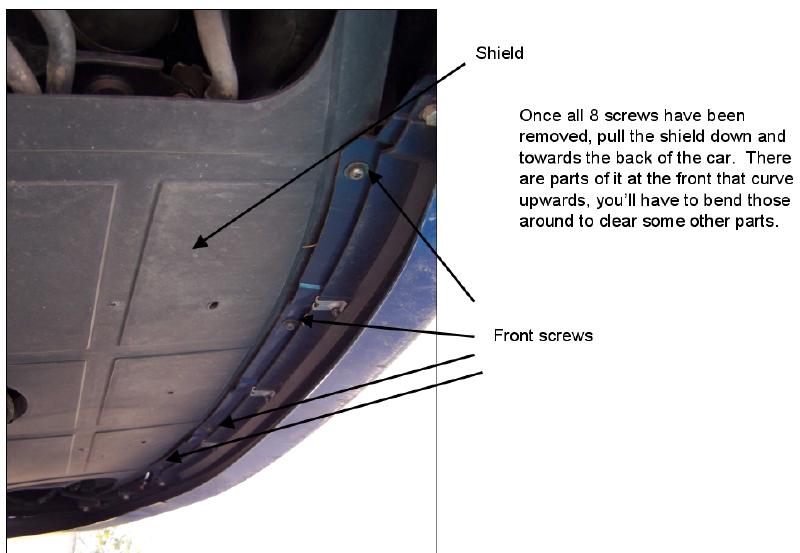
Crawl under the car to get familiar with the layout. Immediately behind the front bumper/spoiler is a plastic shield that must be removed. It is held in place by 8 screws with Torx heads. This is the star shaped kind, which are found all over the 9-5. The front screws are indicated, the 4 rear screws are in similar locations just to the left of the picture.
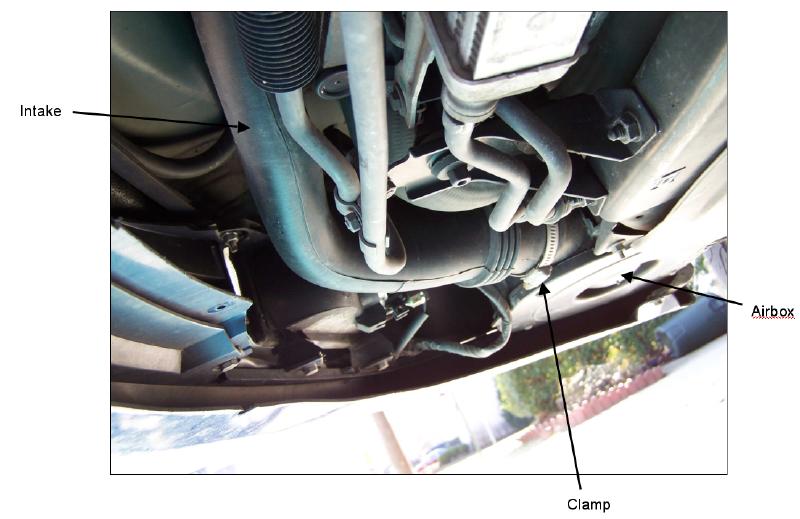
Now you're ready to disconnect the other end of the intake from the airbox. The airbox is just in front of the passenger side front tire. There's a clamp securing the end of the intake to the airbox. Loosen this with a flat head screwdriver, so that the intake can be pulled off the airbox.
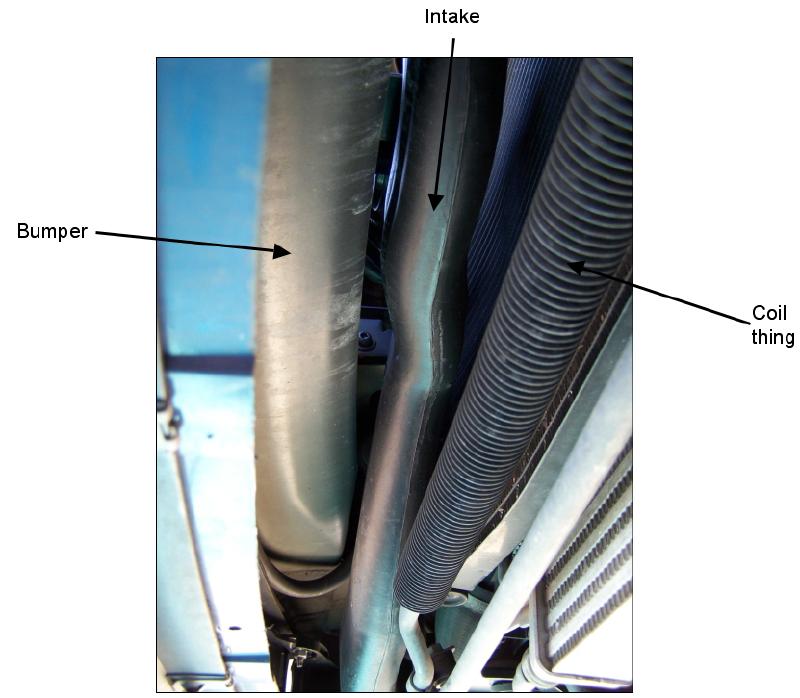
Here's a view looking up at the middle section of the intake. To remove the intake, you'll need to pull it down between the structural part of the front bumper (I think) and whatever this funny looking coil thing is. It will help if you start at the top, getting the little nub and the tab for the bolt cleared of those brackets and pushing it down some.
Installation of the new intake is the reverse. It is a tight fit, but be patient and it'll get up there. I found it easiest to get the end up through that space between the bumper and the coil, then go to the front of the car and pull it up through the grille. It'll be tight and you'll want to be careful not to let it push & scrape against the radiator too much.
Once you've brought it up, get the nub in place and put the bolt back in. Then get under the car and fit the other end to the airbox and tighten the clamp. To replace the air filter, simply remove the four screws holding the lid in place and (if it's present) the bolt that's there securing the front spoiler. It'll be easier to get the lid off and on if you can move the edge of the spoiler out of the way. Just put the new filter in, replace the lid and spoiler bolt, and you're finished.
Converted to HTML by Saabnet.com Site Member Scott Paterson #13
 |
 |
 |
 |
 |
