1994-2002 [Subscribe to Daily Digest] |
 Members do not see ads below this line. - Help Keep This Site Online - Signup
well I did it, and I carried the day (all day I might add). jacked up the front end put it on two jack stands. for front left, did not remove the wheel well plastics, didn't need to. removed both wheels for ease of access. removed the plastic "cowl" covers that cover the bottom of the underside of the car, at the front. took a piece of 2 by 4 about 12 inches long, centered it on the hydraulic jack "lifter", aligned it along the bottom of the engine from front to back, on line with the rear engine mount. raised the jack until it supported the engine in place, and went a skosh higher. loosened the two bolts (15 mm) that insert upwards and hold the engine mount on. didn't take much to get em loose. removed the two bolts that hold the transmission to the mount, they are horizontal, and insert from the center towards the drivers side. took the first two bolts out, mount came off easily. reversed it for the new mount. moved a rubber gasket to the new mount, put blue locktite on the vertcal bolts, and went to 53 ft lbs on all four.
the center rear mount was not so easy, but I could sure do it a a lot faster now. after eyeballing it for a while and checking the posts again, I decided to remove the right angled bracket that bolts the engine to the mount, in lieu of accessing the top nut to the mount. I made sure the engine was still supported by the jack. there are three bolts (15 mm) that go up from the bottom that hold that bracket in. two are recessed in the "folds" of the bracket, one is in plain view. my mount was so collapsed that I had a bit o' trouble getting a socket/wrench on it one of the bolts, but I just put the socket on first and then slipped the wrench on it. next I removed the nuts (5/8) from the bottom of the mount. they are accessible through holes in the subframe, the bolts are vertical. I then gently raised the engine with the jack, about 1 1/2 inches or so. it's kinda tight under there, but I was able to take the bracket and mount together and move it laterally to the passenger side of the car and drop it down through a gap just about 12 inches over that way.
took it to the work bench, removed the bolt and the old mount. installed the new mount, went ahead and tightened it to the bracket. it is obvious how it should go, peg in the gap. now for the tricky part. back up throught the gap in the undercarriage, worked it over to the correct position. after raising/lowering the engine to various slightly adjusted positions, I was able to get those two bolts that stick down from the mount into their assiged holes in the subframe. put the nuts on very loosely. take a large lever (a large screwdriver that a Saab shop left under my hood in 1996 worked for me) and pry the bracket until one of the three bolt holes align, then pop one bolt in and tighthen somewhat. it ain't much prying, since the mount is flexing when when you engage any force. it's more like moving the bracket into to place. I had to lower the engine a bit to get the other two bolts started. torq em all down to 53 or so.
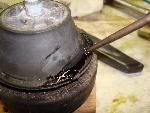
this is from memory, hope it helps. sure made a huge difference in reducing shake and vibration. old mounts were visibly sound, but obviously worn out.
posted by 24.17.185...
No Site Registration is Required to Post - Site Membership is optional (Member Features List), but helps to keep the site online
for all Saabers. If the site helps you, please consider helping the site by becoming a member.
 |
 |
 |
 |
 |