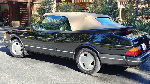
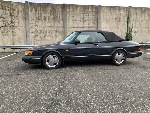
1979-1993 & 94 Conv [Subscribe to Daily Digest] |
 Members do not see ads below this line. - Help Keep This Site Online - Signup
Firstly, let it be known that it is only due to the past adventures of other Saabnet�ers & their generosity in having taken the time to post their knowledge here that enabled my success in this & other repairs.
Secondly, there are two or more failure trends that plague c900 odometers. The following approach addresses the more common (or so I understand & have experienced) slipping metal drive gear problem. If, once you get the odometer apart, discover that there are broken parts - I recommend you obtain a replacement cluster�but not install it before preemptively addressing the common slipping drive gear issue, as half the battle is removing/replacing the cluster.
Although minimally invasive, this fix entails some fairly intricate steps�patience & at least a modicum skill level is required. The former is essential�but if lacking the later, you can get by with a bit of common sense & lots of determination.
So, start by removing the facia. In the interest of brevity I�ll omit instruction on this step other than to say it�s not as difficult as it looks. Well ok, here are some tips; you can leave the steering wheel in place if desired, there are x4 long �screws�, each of different length, labeling each connection is wise (I rec. taking digital pictures as you go) & the medusa entanglement of vac hoses releases easily by prying it�s gold colored retainer off. There are also a few things worth addressing back there while it�s out�ie, re-wiring the cig lighter to �accessory� power (otherwise it�s only useable when the ignition is on�very annoying) - burned out bulbs (or those that have dark glass & won�t last much longer) - securing the dimmer rheostat w/epoxy (it tends to spin) - broken facia retaining tabs (more epoxy). Replacing a leaking heater valve (if you�re lucky enough to find a new OEM unit�or a used one for that matter, aftermarket valves SUCK) - I�m sure others will chime in with more.
Once the facia�s out, pull the instrument cluster. There�s x4 screws, then the stuff behind�pretty obvious, take notes. Remove all three instruments, it�s easier in the long run & you can clean out some dust. The lighting rheostat for the instruments (not the one referred to earlier) has to come out first so the flexible plastic wiring �circuit board� can be lifted up.
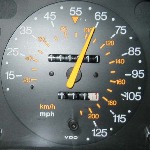
Now comes the hard part. The odo cartridge has to be split, so the speedo needle has to come off. There�s no way around this & unfortunately you�re probably going to break it (I broke it the 1st time, but it mended nicely w/super glue). I avoided breaking the needle the 2nd time, but still sweated nervously getting it off. Start gently moving the needle under it�s stop & discretely marking the face where it comes to rest. Then, using a small flat bladed screwdriver, snap off the tab under the short end of the needle�now pull the needle off (good luck!). You can re-attach both items later using RTV silicone. Ok, so now you�re looking at a gold colored plate. The two holes should line up w/the direction the needle pointed. Put a mark on the edge of the plate & another on the base of the shaft that line up w/the mark you made on the face. You now have a decision to make�logic dictates pulling the mounting plate off the post, but this is VERY difficult - you�re going to bend the post in the process & sweat a lot doing it. An alternative would be to grind off enough metal from two opposite edges of the gold plate that you can angle the speedo face over it. If I have to do this repair again on another c900 (Ha, yeah, �if�), that�s what I�m going to do. Seriously, pulling that gold plate off is no fun�but if you opt to take that route, the mounting post can be made straight again without too much trouble. If you choose to grind, exercise due care (remember that you can always take more off�but can�t put it back on) & be sure to mask off the area beneath to keep crumbs of metal from entering the works.
Once the speedo face is off, remove all relevant screws & split the cartridge�take notes/photos. Head right for that grey metal gear & see how easily you can persuade it to spin on it�s axle. The unit I recently fixed had been repaired before�the back of the speedo face had DS ~ SSS ~ 95, 019 ~ 11/16/95 written on it. Well from the PO�s records, that repair lasted about one year/14k mi, as the odo had been stuck at 109,200mi since 1997. The repair apparently consisted of peening the hub of the metal gear so it would grip the axle better. Other than that not working to well, there was an obvious lack of lube. I hope �DS/SSS� reads this. My technique should effect a permanent fix�it�s similar to what I read in a post from �Alfred E. Newman� last year, but simpler.
Carefully pry the numbered wheels apart (just a little) one at a time & set your preferred mileage. Then align the metal drive gear on the axle so the numbered wheels advance properly when you spin it - note that the spacing immediately to the left of the drive gear is a tad wider than it seems it should be, that�s normal. Using a 1/16� bit, drill a hole into the hub of the metal gear at an angle. Don�t worry about chewing up the frame on the right, or the metal shavings your making�nothing to be done about either & you can get the metal shavings up afterward using a Qtip w/some loctite on it. Be careful & concentrate on what you�re doing or you�ll snap the bit. The objective here is to drill into the axle just enough to allow a post (I�ll get to that in a minute) to be inserted & immobilize the gear�don�t drill all the way through the axle! You can gauge your depth by inserting a small nail, brad or another 1/16 bit into the hole periodically to see if the gear still spins. Once proper depth has been achieved, take the nail, brad or drill bit (most everybody has a broken one), trim it so it just barely protrudes from the hole & secure it in place w/red loctite. Now pull off the two outboard nylon gears. Be careful not to disturb the position of the axle & thus ruin what you just accomplished. Hmmm, maybe it�s best to pull them off before hand�? Anyway, once they�re off, using a Dremmel/rotary tool & cut off wheel, score the surface of the outboard portion of the axle repeatedly. Now, using a dental type tool, scribe a few grooves into the inside of the two nylon gears, apply more red loctite & push them back on. NOTE that you must brace the opposite end of the axle against something solid before doing this!!! I�m sure you can guess what might happen if you don�t! OK, apply whatever lube de�jour you�d like (see related post from a few days ago) to all moving parts that already have grease on them, including a drop of oil to the ends of all axles, reassemble & you�re done. You can test the unit w/a spare speedo cable & a drill (set for reverse). Don�t forget to reposition the speedo needle above the stop�Doh!
posted by 131.109.22...
 , Tue, 16 Dec 2008 14:16:25
No Site Registration is Required to Post - Site Membership is optional (Member Features List), but helps to keep the site online
for all Saabers. If the site helps you, please consider helping the site by becoming a member.
 |
 |
 |
 |
 |