1979-1993 & 94 Conv [Subscribe to Daily Digest] |

Here in the rusty northeast that's a real problem.
I just re-started an '89 I last drove 5 years ago. Just before parking it I had replaced the two rear steel lines on the axle. The bleeders then were terribly rusted, necks broken off where the caps should have been. I tapped down on them vertically with a hammer, some penetrant, and using vise grips got them to come loose. Oiled, got brakes bled, then a few days later I found a parts store that had some metric bleeder screws and sold me two. Chucked them in the glovebox with two Ate rubber caps and they sat there 5 years.
Car came out of its sleep fine but promptly one of the rubber rear hoses from body to axle cracked thru at one end (rust had crept into the barb itself). Fixed it. The other hose, before I could get to it, blew itself right off the barb so I had to do that one too.
Both of them the bleeders were a disaster, 5 more years of rust after already needing replacing. But I got them both out and here's how:
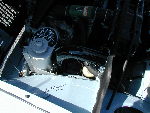
I pulled the caliper pin closest to the bleeder, then pried the rubber sleeve out of the caliper itself so I wouldn't burn the rubber.
Then I turned a MAPP gas torch on the caliper and bleeder. Caliper is so massive it doesn't really work well, it won't heat up much, but after about 2 minutes of playing flame I squirted some oil on it. Also, down into the bleeder's hole - - without the rubber caps salty water can get down in there and start rusting the threads from the bottom up.
I repeated the heating thing maybe four or five times, also spraying PB Blaster. And, tapping vertically on the stub of bleeder with a hammer to try to crush up any rust in the threads.
Then finally I locked a pair of 10" Vise Grips with old jaws, front part not all little sharp diamond teeth, vertically onto the stub. Locked hard.
Then tapped lightly on cheek of vise grips in loosen direction, then in tighten direction, back and forth, and after about 20 taps, the bleeder actually showed some real motion. A few slight back-and-forths and it freed right up and I was able to get it out.
Ran it in and out a few times and wiped rusty fluid off the threads, then installed my brand new bleeder, back-bled brakes using a 2-oz. syringe from a feed store with clear poly hose from hdwe. store, two full syringes worth, put rubber cap on and done. Oh also topped up reservoir.
If it's really rusty it's important not to just lock something on the bleeder and try to do it by brute force, it may just snap off at the caliper. It's hollow and it's easy to wring its poor neck.
I wouldn't use smaller vise grips, 7" size, here, they seem to always chew things up, slipping loose and taking off more metal every time you re-lock them and try again.
If your bleeders are still mostly there you can try just the vertical tapping, then put a six-point 8mm socket down over them, adapt it up to 3/8" drive so you can use a wrench with good leverage and control on it, and take it out with a ratchet or breaker bar. This helps keep your twisting force in line with the plane of the screw - - using a standard box end wrench, the angle it sits to the handle makes it easy to put some of the force into bending the bleeder, making it likely to shear.
Oil down inside the bleeder screw hole puts oil on the bottom threads as they rise out of the hole. This helps when rust has been a problem as it doesn't keep grabbing on the dry threads of the bolt coming up past it.
posted by 71.173.79...
 , Thu, 28 Aug 2014 16:36:41, Fri, 29 Aug 2014 08:00:17, Fri, 29 Aug 2014 18:13:44, Fri, 29 Aug 2014 09:02:16
No Site Registration is Required to Post - Site Membership is optional (Member Features List), but helps to keep the site online
for all Saabers. If the site helps you, please consider helping the site by becoming a member.
 |
 |
 |
 |
 |