1994-2002 [Subscribe to Daily Digest] |
 Members do not see ads below this line. - Help Keep This Site Online - Signup
I couldn't ignore the growing To-do list on my Viggen any more, so yesterday I got to work. Fixed passenger front window roller problem, replaced left foglight assembly, and changed cabin air filter. I was able to find detailed instructions for all the work and I greatly appreciate the value of Saabnet in maintaining my car.
I hope I could be any help to any future DIYers.
Green Window lift roller:
The post by Jeff in ATL
http://www.saabnet.com/tsn/bb/NG900/index.html?bID=225976
was excellent. I got the part form E----parts for 4.19. Part #:4493433. You can directly order for their website. The only catch was I couldn't take the broken rear roller out through the rear opening of the rail. I had to take the front roller out first and tilt the window to get the rollers out. The scissor knob had to be pushed in with force into the roller with a click when assembling. Be careful not to drop the small parts inside the door. Half an hour to an hour for the first timer. Much less for experienced.
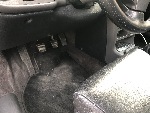
Viggen & OG 9-3 Fog light replacement:
The post by pmr
http://www.saabnet.com/tsn/bb/NG900/index.html?bID=158377
was right on. My left foglight broke from scraping the front dam. For viggen owners, scraping once in a while is nearly unavoidable, but still be careful, it could be an expensive ($150.40) one. The two bottom bolts were fine, bt working on the top nut was a true test of patience. As pmr wrote, universal joint and 6" extension is required. Still with those, be ready for a real tight work space! and not a straight shot at that. Also, the top bolt needs to be completely inserted to the existing groove to hold the assembly tight. Another issue was the electrical connection for the direction light (not the blinker) in the fog light. The red square on the side comes straight out. Use a small flat screw driver on the small groove at the bottom and use a little force. Lastly, there is a small plastic piece that seemed to seal one side of the assembly that needs to be taken off from the old assembly. Be careful when taking that out. It happened to be so brittle, I broke mine. Expect an hour or more for the first timer, I think I can now do it in half an hour now.
For cabin air filter I reused the one that was washed after being taken out about 20k miles ago. I have two sturdy ones (OEM filter) and I think I'll reused them for a while. Search for a detailed instructions here. In summary, mark wiper locations with tape, pull wiper nut covers if you still have and take the nut out, wiggle the wiper arms out gently, lift the long hood rubber seal, remove top plastic cover (there will be some bending in the middle), remove bottom plastic cover, now the filter is visible, lift the handles at the ends, unclick and lift up, check the position of the half circle of the filter and put the new one in until the click on both sides, reassemble.
borami
'00 Viggen
posted by 70.23.51...
No Site Registration is Required to Post - Site Membership is optional (Member Features List), but helps to keep the site online
for all Saabers. If the site helps you, please consider helping the site by becoming a member.
 |
 |
 |
 |
 |