1994-2002 [Subscribe to Daily Digest] |
 Members do not see ads below this line. - Help Keep This Site Online - Signup
Bill H,
Alright....here it is. Its a bit crude for those of us who work on the floor in our garages, but it worked fine. (I can hear Anders cringing now!)
Put the new bushings in your freezer overnight...this will help you later.
Leave them there until you are about to press them in.
I changed one side at a time. First side took me about 2 hours, second about 1hour.
Jack the car on the first side. I always use at least one extra jackstand for safety. Remove the rear control arm...3 bolts...one at the rear bushing, one at the anti-roll bar (on 1994 and first 1/2 of 1995's only--on later cars it hooks to the front control arm)..and one where the two control arms meet.
The trickiest part:
Push the bolt up thru on the connection between the two control arms. Its a bit difficult as it hits the CV boot, but I pushed upwards with a punch and pryed it a little while rotating the wheel to find a "notch" in the CV joint which would allow me to get this bolt up and out.
The rear bushing has a two-part tin sleeve in it which holds it in it's place...the bolt goes thru it. Once you have the bolt out, pull the bottom half of the sleeve down and out with some needle nose. The top half can be removed once you have the control arm/bushing on the bench top.
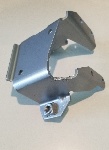
Remove the rear control arm...this takes a little playing around with a pry bar as the anti-roll bar puts some torque on it.
Place the control arm in a vice. Cut the rubber out of the rear bushing. I got one of those Roto-Zips for xmas and this worked well. You all are probably smart enough to figure out any other way to cut this out. Pull the other 1/2 of the tin sleeve out of the bolt hole in the bushing. Set the tin sleeves aside for install in the new bushing.
You are left with the outer sleeve from the bushing pressed into the control arm. Disassemble/reassemble your hacksaw so the blade is inside the sleeve. Carefully cut just enough to get thru the old bushing sleeve. Pry it out with a screwdriver.
Go get the new bushing from your freezer...its contracted from the cold somewhat to make pressing it into place easier.
Fit the new bushing into place...pay attention to the "dot" on the control arm and line the "arrow" on the bushing up with it. I pressed most of the bushing into the new arm using my vice, but my vice is not too large and it ran out of power at the very end. I finished by tapping it into place with a hammer with the arm sitting across a couple of 2x4's. If you have a larger vice than me, you should be able to press it all in with your vice.
OR if you have access to a hydraulic press, this would be ideal.
Reinstall the control arm. Place the top tin sleeve in the bolt hole on the new bushing. Put it on the car...this takes some jimmy-ing with the pry bar to get the anti-roll bar in place. Insert the bottom tin sleeve once the holes line up on the rear bushing.
Again, its trickey, but you can get the top bolt back in where the two control arms meet by playing with the CV joint position and jiggling the bolt towards the back of the car. This part caused the most swearing for me.
Blue locktite on the threads. 55-60 ft lbs on the two large bolts and 18 ft lbs on the anti-roll bar.
Repeat on the other side.
Let me know if you have questions or anything to add.
Hope this helps,
Nick
95 900s
93 900s
...Saabs since '86
posted by 24.160.2...
No Site Registration is Required to Post - Site Membership is optional (Member Features List), but helps to keep the site online
for all Saabers. If the site helps you, please consider helping the site by becoming a member.
 |
 |
 |
 |
 |