1964-1974 [Subscribe to Daily Digest] |

The three holes are there just to provide a coarse adjustment for making sure the rod has enough travel to raise the headlights completely. If your headlight pods are rubbing against the edges of the wells, I don't think changing this adjustment is going to do anything to help.
The travel limit of the headlight pods is SUPPOSED to be determined by the little vertically-adjustable inverted-L-shaped tabs inside the front of the nose section.
-- When the headlights go up, how far they go is limited by the metal tang that sticks out at the bottom of each pod (you know, the one with the rusted-out adjusting bolt in it.) When the headlight comes up, this bolt hits the L-shaped tab, stopping the pod from rising any further. (You're supposed to adjust the linkage so both headlights are held against the tabs by spring tension -- this keeps the headlights from vibrating as you drive.)
-- When the headlights go down, the front edge of each pod is supposed to stop against a couple of little rubber bumpers on the L-shaped tab. (Don't be disappointed if the little bumpers have long since rotted away. It happens to everybody.)
So, you're supposed to be able to define the pod's limits of travel by adjusting the "down" position via the L-shaped tab vertically (it's secured by two little bolts that run out through the front, and has slots in it to allow travel... except that the bolts usually are rusted solid by now) and the "up" position by adjusting the stop bolt on the tang.
You shouldn't need to adjust the linkage other than to make sure it can travel far enough to press the tang firmly against the stop in the "up" position, and can retract far enough to let the pods rest against the rubber bumpers in the "down" position.
There's a detailed procedure for this in the Official Workshop Manual Sonett Supplement o' Doom. It involves pulling out the umbrella handle inside the car to two specified distances, making index marks, and then adjusting the stop bolts on the two headlight pods so the tangs press firmly against the tabs. (You use two marks because the right-side headlight needs more tension to compensate for the extra flex in the linkage that runs across the nose.)
BUT... you probably can skip all that for now, because I suspect that none of it has anything to do with your pods rubbing on the wells! More likely, I'll betcha, is that that bushings inside the nose are shot. These bushings are plastic rings that line the holes through which all the rotating parts of the retracting mechanism run; there's a total of four bushings, one on either side of each pod.
The bushings are designed to assure a snug fit for the rotating parts while being slippery enough to allow smooth operation. Over time, though, they go the way of all plastic and get hardened, cracked and deteriorated. This allows the pods to slide out of position, causing such problems as misalignment (rubbing of the pod on the well) and very difficult operation (the main reason most veteran Sonett III drivers have a left bicep much bigger than the right -- it's from years of yanking on that #%*& handle!)
The right way to fix it is to remove the nose, tap out the taper pins that hold the pods' linkage together, remove the pods and crossbar, and replace the bushings with new ones. Back in the day this was considered a routine service procedure, and is described briefly in the aforementioned Sonett supplement.
Unfortunately, by now the taper pins usually are rusted in place, the linkage ditto, and I have absolutely NO idea of where you'd get new plastic bushings of the proper sizes. If anyone knows, PLEASE POST THE INFO HERE as I need some too, okay???
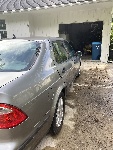
While we're all waiting, you might want to layer some clear tape along the back edges of the wells to protect your paint...
posted by 204.76.11...
No Site Registration is Required to Post - Site Membership is optional (Member Features List), but helps to keep the site online
for all Saabers. If the site helps you, please consider helping the site by becoming a member.
 |
 |
 |
 |
 |